环境说明
- Kubernetes Version:
v1.20.4 (kubekey 部署)
- 操作系统:
CentOS 7.9.2009
- Rancher Version:
v2.4.15
准备 k8s 模拟环境
此次将使用 kubekey 进行一键部署,kubekey 底层 集群部署 基于 kubeadm, 感兴趣的话,可以前往 Github 地址 进行详细了解。
编译安装 kubekey
省略系统初始化步骤,执行编译时,使用到了 docker 容器,请事先进行安装。 对应系统初始步骤,可 参考文档
 1
 2
 3
 4
 5
 6
 7
 8
 9
10
11
|
yum install -y git

git clone https://github.com/kubesphere/kubekey.git \
&& cd kubekey

./build.sh -p  # 执行编译, 如需进行交叉编译,需要在此脚本中添加对应环境变量。

cp -a output/kk /usr/local/bin/

kk version # 如打印了下面字段,则表示成功
version.BuildInfo{Version:"latest+unreleased", GitCommit:"f3f9e2e2d001a1b35883f5baea07912bb636db56", GitTreeState:"clean", GoVersion:"go1.14.7"}
|
启动集群
 1
 2
 3
 4
 5
 6
 7
 8
 9
10
11
12
13
14
15
16
17
18
19
20
21
22
23
24
25
26
27
28
29
30
31
32
33
34
35
36
37
38
39
40
41
42
43
44
45
46
47
48
49
50
51
52
53
54
|
mkdir -p  ~/kubekey-workspace

kk create config --with-kubernetes v1.20.4 # 初始化配置文件

cat config-sample.yaml
apiVersion: kubekey.kubesphere.io/v1alpha1
kind: Cluster
metadata:
  name: sample
spec:
  hosts:
  - {name: node1, address: 192.168.8.70, internalAddress: 192.168.8.70, user: root, password: 123456}
  - {name: node2, address: 192.168.8.71, internalAddress: 192.168.8.71, user: root, password: 123456}
  roleGroups:
    etcd:
    - node1
    master:
    - node1
    worker:
    - node1
    - node2
  controlPlaneEndpoint:
    domain: lb.kubesphere.local
    address: ""
    port: 6443
  kubernetes:
    version: v1.20.4
    imageRepo: kubesphere
    clusterName: cluster.local
  network:
    plugin: calico
    kubePodsCIDR: 10.233.64.0/18
    kubeServiceCIDR: 10.233.0.0/18
  registry:
    registryMirrors: []
    insecureRegistries: []
  addons: []


yum install socat conntrack -y # 安装依赖

kk create cluster -f ./config-sample.yaml  # 启动集群
+-------+------+------+---------+----------+-------+-------+-----------+---------+------------+-------------+------------------+--------------+
| name  | sudo | curl | openssl | ebtables | socat | ipset | conntrack | docker  | nfs client | ceph client | glusterfs client | time         |
+-------+------+------+---------+----------+-------+-------+-----------+---------+------------+-------------+------------------+--------------+
| node2 | y    | y    | y       | y        | y     | y     | y         | 20.10.7 |            |             |                  | CST 09:39:04 |
| node1 | y    | y    | y       | y        | y     | y     | y         | 20.10.7 |            |             |                  | CST 09:39:04 |
+-------+------+------+---------+----------+-------+-------+-----------+---------+------------+-------------+------------------+--------------+

This is a simple check of your environment.
Before installation, you should ensure that your machines meet all requirements specified at
https://github.com/kubesphere/kubekey#requirements-and-recommendations

Continue this installation? [yes/no]: yes  # 输入 yes
|
Rancher 导入启动的集群
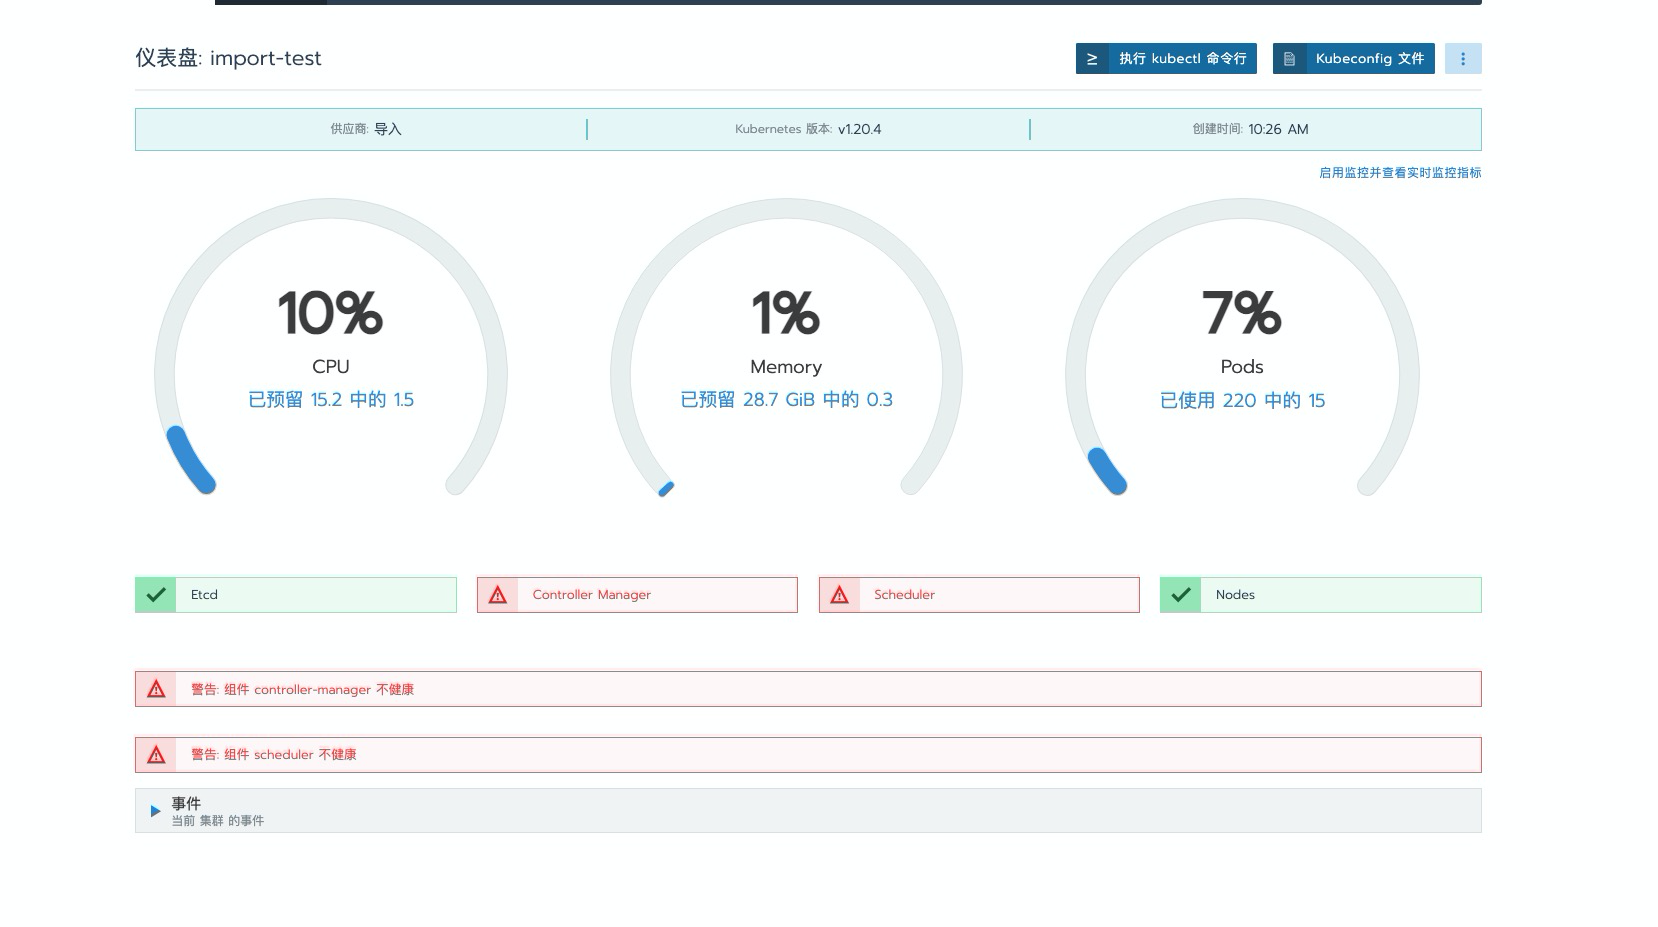
省略创建导入步骤。问题如下所示,dashbaord 界面 上提示 Scheduler & Controller 组件不健康

1
2
3
4
5
6
|
kubectl get cs
Warning: v1 ComponentStatus is deprecated in v1.19+
NAME                 STATUS      MESSAGE                                                                                       ERROR
scheduler            Unhealthy   Get "http://127.0.0.1:10251/healthz": dial tcp 127.0.0.1:10251: connect: connection refused
controller-manager   Unhealthy   Get "http://127.0.0.1:10252/healthz": dial tcp 127.0.0.1:10252: connect: connection refused
etcd-0               Healthy     {"health":"true"}
|
问题说明与修复
此问题原因为: 在较新版本 kubeadm 部署的集群中,默认将 http 通讯端口进行了关闭,导致在进行健康检查的使用无法进行通讯,自检失败。解决此方法的思路目前有两个,第一种 : 是将自检调用的端口更改为 https,第二种: 是将 http 端口监听进行修复开启。下面介绍使用第二种较为简单 的方法进行示例修复 (此方法有一定的安全风险,请自行评估使用)。
修复 http 端口的监听
由于使用的是 kubeadm 部署集群,更改对应静态 pod yaml 文件配置即可
 1
 2
 3
 4
 5
 6
 7
 8
 9
10
11
12
13
14
15
16
17
18
19
20
21
22
23
24
25
26
27
28
29
30
31
32
33
34
35
36
37
38
39
|
vi /etc/kubernetes/manifests/kube-scheduler.yaml # 编辑 scheduler 配置文件
...
spec:
  containers:
  - command:
    - kube-scheduler
    - --authentication-kubeconfig=/etc/kubernetes/scheduler.conf
    - --authorization-kubeconfig=/etc/kubernetes/scheduler.conf
    - --bind-address=0.0.0.0
    - --feature-gates=CSINodeInfo=true,VolumeSnapshotDataSource=true,ExpandCSIVolumes=true,RotateKubeletClientCertificate=true,RotateKubeletServerCertificate=true
    - --kubeconfig=/etc/kubernetes/scheduler.conf
    - --leader-elect=true
#    - --port=0     # 将此段进行注解
...


vi /etc/kubernetes/manifests/kube-controller-manager.yaml # 同上一样 更改 controller 的配置文件
...
spec:
  containers:
  - command:
    - kube-controller-manager
    - --allocate-node-cidrs=true
    - --authentication-kubeconfig=/etc/kubernetes/controller-manager.conf
    - --authorization-kubeconfig=/etc/kubernetes/controller-manager.conf
    - --bind-address=0.0.0.0
    - --client-ca-file=/etc/kubernetes/pki/ca.crt
    - --cluster-cidr=10.233.64.0/18
    - --cluster-name=cluster.local
    - --cluster-signing-cert-file=/etc/kubernetes/pki/ca.crt
    - --cluster-signing-key-file=/etc/kubernetes/pki/ca.key
    - --controllers=*,bootstrapsigner,tokencleaner
    - --experimental-cluster-signing-duration=87600h
    - --feature-gates=CSINodeInfo=true,VolumeSnapshotDataSource=true,ExpandCSIVolumes=true,RotateKubeletServerCertificate=true
    - --kubeconfig=/etc/kubernetes/controller-manager.conf
    - --leader-elect=true
    - --node-cidr-mask-size=24
#    - --port=0
...
|
一键使用 sed 替换方式
1
2
|
sed -i 's/.*--port=0.*/#&/' /etc/kubernetes/manifests/kube-controller-manager.yaml
sed -i 's/.*--port=0.*/#&/' /etc/kubernetes/manifests/kube-scheduler.yaml
|
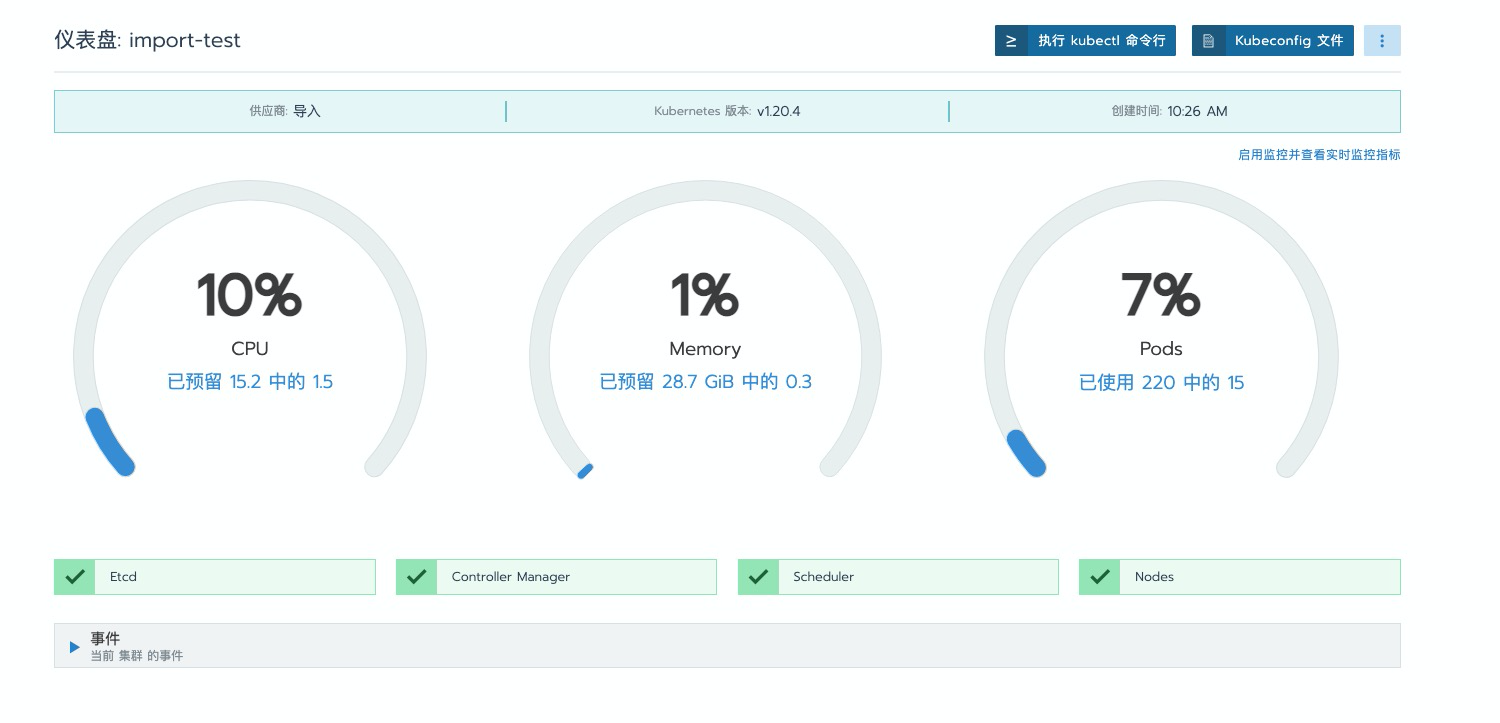
再次前往对应 dashboard 界面进行查看,可以看到已无之前的错误提示

1
2
3
4
5
6
|
kubectl get cs
Warning: v1 ComponentStatus is deprecated in v1.19+
NAME                 STATUS    MESSAGE             ERROR
controller-manager   Healthy   ok
scheduler            Healthy   ok
etcd-0               Healthy   {"health":"true"}
|
ToDo

